We all want our photos to represent a true likeness of our gardens. We want to preserve and share flowers and foliage in all their varied hues and subtle shades. Digital cameras are wonderful tools, but they can produce results that are disappointing.
For example overexposure is too much light or light from a bad angle registering on the camera sensor. Colors look washed out, sometimes the foliage seem grayish and flowers are pale shadows of their true, vibrant selves. This is very frustrating because you see the colors before you are bright and beautiful but your camera is showing an image of colors that are anything but.
Underexposure is the opposite. Not enough light is coming thru the lens and your camera doesn’t see details. Colors are too dark and are not true. Objects are just silhouettes.
If you realize you’ve taken a bad photo, sometimes you can just snap another with better exposure, but not always. What if you are on a garden walk in the blazing sun? Many of your photos may be overexposed but you can’t really go back for a re-take.
Unless you are a professional photographer, bad photos happen. Even professionals, or I should say especially professionals, attempt to fix camera exposure problems and portray pictures as true to natural as possible. Adjusting the settings on your camera is a good place to start. Read the owners manual, it is the first best fix to get good pictures. The second best fix can come with a photo editing program.
Photography is a passion with me. I want to continue learning to take better pictures that I can enjoy and share. I have both Adobe Photo Shop and Paint Shop Pro. Photo Shop does an adequate job of fixing over and underexposures. If you have either of these or a favorite program, you know exactly what to do to make your pictures more true to life. If you don’t have a program, you can download Serif Photo Plus 6 for free. This is probably the best little editing program I’ve used for quick fixes. 1. It works with layers (which you may or may not ever use). 2. It does a good job with over and underexposure provided there is enough detail on the photo card to work with. A simple adjustment with two sliders can make washed out pictures regain their true vibrancy and the colors pop. 3. It allows you to add text to your pictures. Using text you can sign and date your work or add the botanical names of plants. 6. It crops if you want to enlarge a flower or eliminate a kid sticking out his tongue. 5. PP6 has a very simple cloning tool that can be used to remove power lines or other distracting details from photos.
First law of photo editing! Make a copy of your original and work with the copy only.
Second law when working with Serif Photo Plus! Save photos using 'Export'. To save your pictures go to File > Export and be sure the file type is .jpg. (You do not want to use File > Save As because PP6 saves as a file type that Blogger, Photobucket, Flickr, and many other programs cannot read.)
So if you are still reading, here is how to fix a washed out photo and make the natural, true to life color reappear. Photo Plus 6 shines in this department. IMHO, the best feature is the view as you edit. You are not looking at a tiny little pixilated editing screen like you do with most programs. The edits appear in real time with a full screen shot. Do not click OK until the picture looks like the real deal. Even after you click OK to correct the photo, you can go back to >Edit >Undo, and get back the original to start again. When you are done, remember to File > Export as a .jpg file.
Beckie from Dragonfly Corner took the first photo below of her beautiful red caladiums. She was disappointed when she downloaded the picture because her camera had washed out the vivid reds. Beckie thank you so much for allowing me to use your picture. These really are beautiful leaves, just a little overexposed.


All of us get frustrated if we can’t show a flower or object that looks real. I used PP6 and went to Image > Adjust > Brightness/Contrast. First I pulled the top slider Brightness to the left a little to darken and correct washed out colors. Then I moved the bottom contrast slider to the right to make the lost detail reappear. I didn’t have a red caladium so I adjusted from memory until the photo looked like caladiums I’ve seen in the past. Of course it’s easier to get exact colors if you have the plant sitting in your yard.
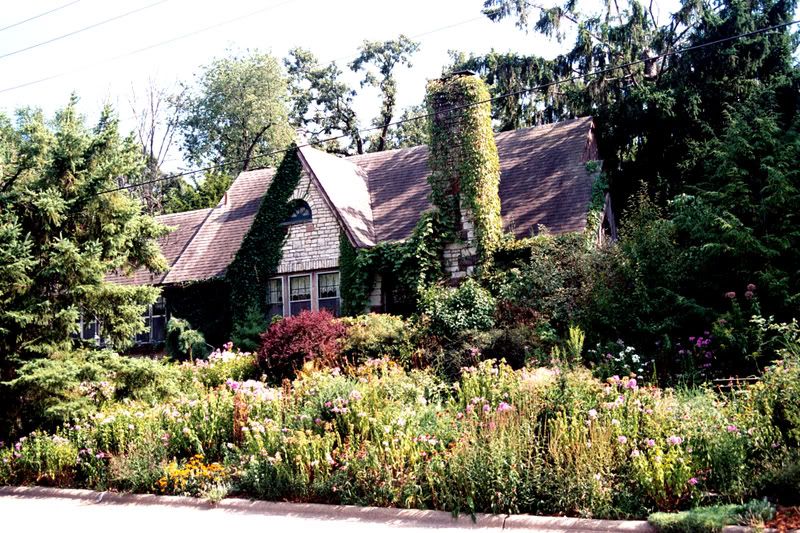
Same with this washed out, overexposed cottage. Trust me, the foliage was not really pale and gray. This cottage garden may have been past its prime in mid July but it never had the smoky haze this photo shows. The first photo is not true to life. The second is a much more realistic representation of how it appeared to the human eye.

 I’m sorry, this is running on much longer than I intended. I will show the PP6 photo text feature, fixing underexposure, and the cloning feature in later postings.
.